Yesterday was my first show in about two years. It was down at the Eiteljorg museum in Indianapolis. Originally, I was stuck down in some off-hallway classroom. That's where Dad and I set everything up on Friday. However, on Saturday morning, several scheduled artists didn't show, so I was allowed to move up to the main hall and next to my ISLAGA pals Chiq Elbert-Velazco and Fran Carrico. Not surprisingly, it was a bit of a slow because of the economy and as compared to the annual Bead Bonanza they normally hold.
On the bright side, I got my first indoor booth shot, so now I have an outdoor and an indoor shot to use for applying to future shows. There are a few things wrong with the shot. For one, I did not use my table skirt because of the way I configured the tables; therefore some of my "rough edges" are showing. Also, one of my light bar zip ties came loose while we were moving my booth from the basement to the hall. Otherwise, I think it turned out really well and I was proud of my booth. Yay!
Sunday, March 29, 2009
Thursday, March 26, 2009
Booth Shots
Today, my dad and I setup my booth in the back yard for the sole purpose of taking a picture. (It was hard work and I couldn't have done it without him, so thanks Dad!)
Most arts and craft shows have an image to maintain and frequently request a picture of your booth along with images of your work in order to decide whether or not you meet their standards. To them, your presentation is almost as important as the originality and quality of your work, and it can be the deciding factor between you and another artist.
As I researched good booth shots, I was surprised to find that a "booth shot" is a picture of your "in-person" sales space that represents your ability to display your wares. In other words, it doesn't have to be an actual set up of your booth in action, or the way you would set it up for a particular show.
The best information I found about booth shots was written by Larry Berman at www.bermangraphics.com. I think the most helpful part was his article entitled "Improving Your Art Show Booth Slide" (before the Internet age, most juries required actual physical slides - some still do!).
I took many pictures throughout the day and finally settled on the one below. I don't really like how the sun crept in on the far left side, but it was the best shot of the best arrangement all day, so I went for it.
Several shows I am applying for use a site called Zapplication.org. The web application automates the entire jury process, including judging. It has specific requirements for photos, which is why you see those black spaces in the image below. When my booth shot comes up on a juror's black screen, the black spaces will blend into the background. (For non-Zapplicaiton.org shows, I'll submit a booth shot without black spaces.)
Now, on to the bead photos! Wish me luck!
Friday, March 13, 2009
Studio Tour - Torch & Ventilation
A while back I abandoned my old website in favor of the blog format. A few days later, one of my friends told me how much she liked that I told about how lampwork beads were made on my site. Well, that page no longer exists, so I thought I'd do a series of posts on my studio, then a series on how I make my lampwork beads.
In this post, I will introduce you to the basics of my own studio setup.
First, I have a torch. It is a special flameworking torch. It is called a Mini CC, is solid brass, and is made by Carlisle Machine Works. There are several torch manufacturers for flameworking and the price of a surface mix torch can run from under $200 to $2,000 and beyond.
Most flameworking torches require two things to run.. gas and oxygen. These two chemicals ignite and burn at the tip of the torch, which is why they are called surface mix torches. For natural gas, any plumber can pipe a gas terminal close to the torch setup. For propane, the tank must remain outside the house and run to the torch using a hose. I use natural gas because it is cleaner and I never have to worry about running out.
For oxygen, many lampworkers use recycled and/or "boosted" medical-type oxygen concentrators. Some use oxygen generators, tanked oxygen, or even liquid oxygen. Generally, the more pure the oxygen, the better the result. However, I use one (sometimes two) very powerful oxygen concentrators that cost approximately $500 each. For me, oxygen concentrators provide an unlimited and safe supply of oxygen, although the purity is not quite as high as I would like.
When the gas and oxygen combust they create carbon dioxide, and since all of the gas may not completely burn at the torch, every flameworker must have some type of ventilation and replacement air solution. Good ventilation is also important to remove harmful elements, such as heavy metals that are sent into the air when burning different types of glass, or using different techniques. I spent a lot of time researching my requirements and hired sheet metal workers to construct and install a safe workstation including an intake air vent and a squirrel cage fan to suck the air in my workstation away from me. By enclosing my workstation I am "trapping" the toxins the best I can for extraction. The sides of the workstation also help to prevent "exploding" hot bits of glass rods from traveling all over my torch room. (The tip of a glass rod may explode if there is air trapped in it when you introduce it into the flame.)
Wednesday, March 4, 2009
Lampwork by Lori - The Early Days
This is a little embarassing, but it's kinda fun to look back.
November 15, 2003 was the day I made my very first bead. I had traveled to my first ISLAGA meeting in northern Indiana. Up to that point, I had read TONS of information about lampworking, and I knew how everything worked in theory, but I hadn't yet had the opportunity to sit down and do the deed.
I was pretty nervous. Those big flames can be intimidating in real life. But, my new friends coached me through it and I made a great bead! (I still have it!)
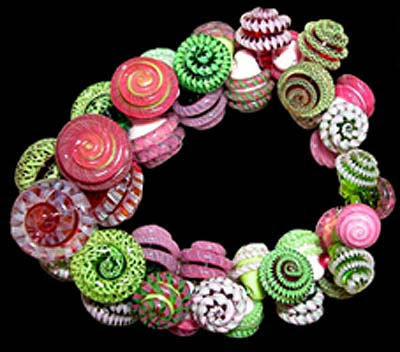
I was delighted, so I signed up for a beginning lampworking class the next month with Jari at Boca Loca Beads. After five years at the torch, I can still say that Jari is one of the most talented beadmakers I've ever met. Here are some of her beautiful glass buttons:
Here is a necklace I made with some of my first beads. (I still have it, too!) And a picture of my first studio in the garage.
Monday, March 2, 2009
New Listings on Artfire and 1000 Markets
Today was a really good day. "My Jakester" (my nephew, Jake) came over and helped me put together some light stands for the track lighting I plan to use over my display tables at my upcoming shows. (Muchos gracias to my bead bud Lisa A for coaching me on the plans.) I can't wait until my booth setup is finished and I can post some pictures. There's much more work involved than meets the eye!
I also wanted to let you know that I have listed many new beads on ArtFire so click the link and check them out! Even if you don't purchase, I'd be very interested in your feedback and any constructive criticism you can offer.
Sunday, March 1, 2009
Blog Marketing Using Entrecard
Have you noticed the "E" widget in the right column? It's called an Entrecard. It's a fun way to advertise on other people's blogs and to discover new blogs.
How does it work? In a nutshell, you go to the Entrecard site, sign up and add their code to your blog.
Then, Entrecard users will request to put their card on your blog. If you accept, it's automatically placed on your widget for 24 hours (one ad at a time). If you don't wish to advertise their blog on yours, you can decline the request. If you like an ad you come across, simply click and visit the blog.
The owners earn 'credits' for each ad you accept. You can earn credits for yourself by clicking the Entrecard ads on blogs you visit. This is called "dropping" your card. You use credits to pay for the ads you'd like to place on other people's blogs.
How do you know where to advertise? If you click "campaign" on the Entrecard site, you can browse Entrecards, click links to view associated blogs, and if you like what you see, you can request to advertise. Since I'm new and have few credits, I look for newer, inexpensive blogs related to jewelry makers because that is my target audience. I can check out a blog to see if I think it would be a good fit for my ad and try to avoid blogs whose works are similar to mine.
Entrecard is a fun marketing tool, and non-commercial blogs are on Entrecard, too. It's for anyone who'd like to drive more traffic to their blog.
My Entrecard looks like this:
What are you waiting for? Sign up and schmooze with me!
Subscribe to:
Posts (Atom)